Getting Started
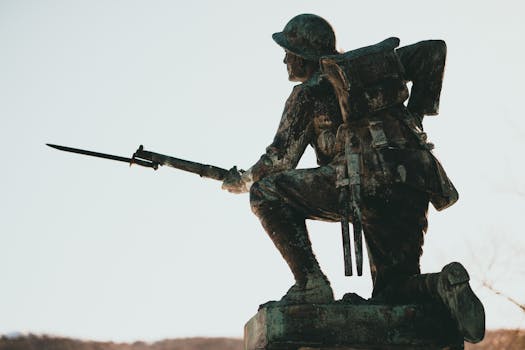
Boot up Battlefield 1 for the first time, and you are immediately dropped into the chaos of World War I. Unlike modern military shooters where you can rely on laser sights, mini-maps bursting with red dots, and fast-moving vehicles, DICE’s WWI masterpiece demands a completely different mindset. Survival here relies on positioning, patience, and understanding the brutal rhythm of early 20th-century warfare.
Before you even think about jumping into a 64-player multiplayer match, your first step should be the single-player War Stories campaign. While the campaign is relatively short, it serves as an invaluable, low-stakes tutorial. It teaches you the basics of using the game’s bolt-action rifles, navigating trench networks, and surviving elite enemy soldiers. More importantly, it familiarizes you with the game’s somewhat unforgiving gunplay. You cannot sprint infinitely, and getting shot usually means dying instantly. Use the campaign to adjust your sensitivity settings and get a feel for how the guns handle before real players start shooting back.
Once you venture into the multiplayer menu, do not immediately queue up for a random game mode. For your first several hours, you should exclusively play Conquest. It is the gold standard of Battlefield, featuring massive maps, control points (labeled A through G), and a heavy emphasis on combined arms (infantry, tanks, and aircraft working together). Conquest gives you the most room to learn the maps, experiment with different classes, and respawn without feeling like you are ruining a 5v5 competitive match for your team. Avoid Rush and Operations initially; these modes funnel players into tight corridors and require advanced map knowledge to survive.
Core Mechanics
Battlefield 1 operates on a set of underlying mechanics that drastically separate it from its contemporaries. Mastering these systems is non-negotiable if you want to stop bleeding tickets for your team.
The Behemoth System
In Conquest and Operations, if one team falls significantly behind in score, a Behemoth will spawn for the losing team. These are massive, highly destructive vehicles—such as an armored train, a dreadnought battleship, or a zeppelin airship. If you are on the losing team and the Behemoth spawns,spawn immediately, even if it means abandoning a good position. You become a massive focal point for your team to spawn on, and a well-crewed Behemoth can completely flip the momentum of a match. Conversely, if the enemy team gets a Behemoth, do not panic. Focus on the objectives. A Behemoth cannot capture flags, and wasting your entire team's lives shooting at an armored train from open ground is a guaranteed way to lose the game.
Attrition and Health
There is no regenerating health in Battlefield 1. If you take damage, you stay damaged until you heal. The only exception is the Auto Regen mechanic, which only kicks in if you reach a specific threshold of health (usually around 30%) and stay out of combat for several seconds—but it will not heal you back to full. You must rely on the Medic class or med crates scattered around the map. Similarly, ammunition is incredibly scarce. You spawn with a limited number of magazines, and there is no unlimited ammo box in your back pocket. If you survive a massive firefight, you will likely be completely dry. Communicate with Support players to get resupplied, or scavenge weapons from the ground if you are desperate.
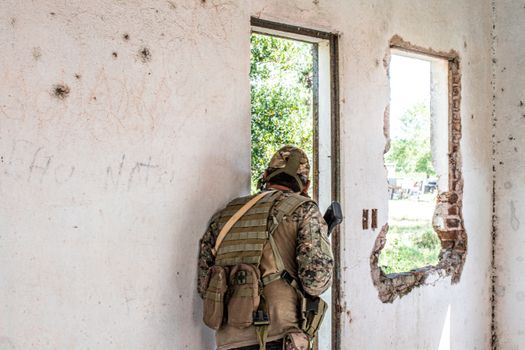
Dynamic Destruction and Trench Warfare
The environment is not just a backdrop; it is a tactical tool. The destruction engine in Battlefield 1 allows you to blow holes in the walls of buildings to create new sightlines or escape routes. Tank shells and heavy explosives can completely level forests, turning dense cover into an open killing field. You must constantly be aware of your cover. If a tank is looking at the wall you are hiding behind, move. Furthermore, learn to use the terrain elevation. Trenches offer fantastic protection from shrapnel and vehicles, but crawling through them makes you a sitting duck for enemy infantry dropping grenades in from above. Always have an exit strategy when moving through trenches.
Weapon Mechanics: Bullet Velocity and Sway
Guns in WWI are heavy, clunky, and fire relatively slow-moving projectiles compared to modern shooters. This means you must "lead" your targets when shooting at moving enemies, especially at medium to long ranges. Additionally, almost all weapons have bloom—a mechanic where consecutive shots fired in rapid succession cause the bullets to deviate randomly from your crosshair. To maintain accuracy, you must learn to fire in controlled bursts or tap-fire rather than holding down the trigger.

Early Game Tips
Your first few hours in multiplayer will be frustrating. You will die to things you cannot see, and you will feel utterly helpless against vehicles. To minimize the pain, prioritize the following strategies.
- Play the Objective, but Smartly: In Conquest, you win by holding flags. However, sprinting directly into a flag that is currently being contested by five enemies is just feeding them kills. Instead, play the "fringe" of the objective. Shoot enemies who are trying to capture it, and only move onto the flag itself when the coast is clear or when you have teammates pushing with you.
- Stick to Your Squad: When you load into a game, ensure you are assigned to a squad. Look for a squad leader (marked with a star) who is actively giving attack or defend orders. Spawn on them, not at the main deployment screen. Spawning on a squad mate puts you exactly where the action is, saving you a long run across the map. If your squad leader is useless, leave the squad and join another one.
- Master the "ADAD" Strafe: Because weapons have high sway and recoil, standing still makes you an incredibly easy target. Constantly strafe left and right (the A and D keys) in unpredictable rhythms while shooting. This makes it remarkably difficult for enemies, especially those using bolt-action rifles, to land a clean headshot on you.
- Spot Everything: Press the spot button (default is 'Q' on PC or 'R1' on PlayStation, 'RB' on Xbox) constantly. Even if you don't think an enemy is there, spam it in the general direction of gunfire. Spotting puts a red marker above the enemy's head for your entire team to see. You will get assist points if a teammate kills someone you spotted, and it is the single most impactful thing a beginner can do to help their team win.
- Learn Two or Three Maps Intimately: Battlefield 1 has a lot of maps, and they are incredibly complex. Do not try to learn them all at once. Pick two or three beginner-friendly maps (like Suez, St. Quentin Scar, or Amiens) and play them exclusively until you memorize the flag layouts, the vehicle spawn points, and the best infantry choke points.
Common Mistakes to Avoid
New players in Battlefield 1 tend to fall into the same predictable traps. Recognizing these behaviors in yourself and actively correcting them will dramatically improve your performance.
- Mistake 1: Sniping from the Back of the Map. Lying on a hill 300 meters away from the objective with a Scout rifle might get you a few kills, but it is actively hurting your team. You are taking up a valuable squad slot and contributing nothing to capturing or defending flags. If you want to snipe, push up to the edge of the objective and provide overwatch for your team's advance.
- Mistake 2: Ignoring Anti-Tank Gadgets. Every class has access to some form of anti-tank capability, whether it's dynamite, anti-tank mines, rifle grenades, or the trench gun (with HE shells). Do not shoot a heavy tank with your standard rifle bullets—it does virtually nothing. If a tank is capturing your flag, it is your responsibility to blow it up.
- Mistake 3>Chasing Kills Outside the Flag Radius. It is incredibly tempting to chase a wounded enemy across an open field to finish them off. Don't. If you are defending Flag B, and you run 100 meters away to get a kill, you have just left Flag B undefended. Let the wounded enemy run away. Hold your ground.
- Mistake 4>Deploying in the Main Base. Unless your squad is entirely dead or the game just started, never spawn at the deployment screen. Spawning at the main base guarantees you a 60-second jog before you see any action, by which point the battle will have likely shifted. Always spawn on a squad mate.
- Mistake 5>Never Looking Up. Battlefield 1 has a surprisingly lethal air game. Attack planes and bombers will frequently strafe infantry positions. If you hear a loud engine drone above you, get under a roof immediately. Shooting at a plane with your rifle is a waste of time unless you are using the Scout class with a specialized anti-air rocket gun.
- Mistake 6>Running in Straight Lines. The maps in this game are filled with craters, destroyed walls, and trenches. Sprinting in a perfectly straight line across open ground makes you a prime target for snipers and machine gunners. Zigzag, use terrain depressions, and break up your silhouette against the background.
Essential Controls & Settings
The default settings in Battlefield 1 are notoriously geared toward casual play and often hinder competitive performance. Before playing your second match, go into the settings menu and make these crucial adjustments.
Key Bindings
- Spotting (V or Q): Rebind this to a mouse button if you are on PC. You need to be able to spot while simultaneously moving and aiming. Taking your thumb off the 'A' or 'D' key to press 'Q' makes you stop moving, which will get you killed.
- Sprint (Shift / L3): Ensure your sprint is set to "Toggle" rather than "Hold." In a game where you spend 50% of your time running between flags, holding shift constantly causes hand fatigue and prevents you from easily adjusting your walk speed to stay quiet.
- Switch Weapon / Gadgets: Familiarize yourself with scrolling the mouse wheel or using number keys to instantly swap to your gadgets. In a panic situation, fumbling to find your med pack or dynamite often results in death.
Recommended Gameplay Settings
- Soldier Zoom Sensitivity (Aim Down Sights): Lower this from the default 100% to somewhere between 50% and 70%. Most new players overshoot their targets when aiming because the zoom sensitivity is too high. Lowering it allows for precise micro-adjustments when tracking moving enemies.
- Uniform Soldier Aiming: Turn this OFF. While designed to make aiming feel consistent across all weapons, it fundamentally changes how your mouse inputs translate to the screen, making muscle memory incredibly difficult to build. Standard Battlefield aiming is much more intuitive.
- Network Smoothing Factor: This should be set as low as possible without causing visual stuttering (usually around 0% to 20%). High network smoothing delays what you see on your screen to compensate for lag, meaning you will consistently die "behind cover" because the server hasn't registered your movement yet.
- Vsync and Frame Rate: Turn Vsync off if your monitor isn't a G-Sync/FreeSync panel, as it introduces input lag. Prioritize a stable frame rate over ultra graphics settings. If you are playing at 30 FPS, you are at a massive disadvantage against players running at 60+ FPS in a game that requires fast reaction times.
- HUD Elements: Go into the HUD options and ensure "Spotting Flare" and "Compass" are set to visible. Turn off anything that clutters the center of your screen, like kill feeds positioned too close to your crosshair.
Progression System
The progression system in Battlefield 1 is twofold: Class Rank and Weapon Rank. Understanding how this works early will save you from feeling overwhelmed by the sheer number of unlocks.
Class Ranks
There are four primary infantry classes (Assault, Medic, Support, Scout) and three Pilot/Tanker classes. You level up each class independently by scoring points while playing as that class. For example, if you play Assault for ten hours, your Assault rank will increase, but your Medic rank will stay at zero. You unlock class-specific weapons, gadgets, and melee weapons by reaching specific class ranks. The most vital unlocks are almost always tied to the early ranks (Rank 1 through Rank 3). Prioritize getting Assault and Medic to rank 3 first, as these classes have the most immediate impact on the game's flow.
Weapon Ranks
Every individual weapon has its own progression track. By getting kills with a specific gun, you earn "War Bonds" for that specific weapon tree. As you rank up a weapon, you unlock special variants of it. For instance, ranking up the MP18 Trench SMG will eventually unlock the "Experimental" variant, which features a different sight and improved stats. To unlock these variants, you must complete specific "War Bonds" challenges, such as getting 50 kills or killing 5 enemies with grenades while that weapon is equipped. Do not spread yourself too thin by using a different gun every life. Pick one gun you like, read the requirements for its next variant, and grind it out until you unlock it.
Battlepacks
As you play, you will earn Battlepacks. These are essentially loot boxes that contain weapon skins, melee weapon skins, and most importantly, Service Stars and Specializations. Specializations are passive perks you can equip on your weapons. They are broken down into three trees: Kill (improves aiming down sights speed and reduces recoil), Cover (improves hip-fire accuracy and suppressive resistance), and Ground (reduces bullet spread when moving and improves recoil recovery). You do not get to choose which Specializations drop from Battlepacks; it is entirely random. However, once you unlock the "Kill" tree specializations for your favorite guns, your gunplay will feel dramatically smoother.
Resources & Where to Find Help
Battlefield 1 has a dedicated, passionate player base that has spent years analyzing the game's mechanics. If you want to improve rapidly, you need to step outside the game client and utilize the community's accumulated knowledge.
Wikis and Databases
- Symthic: If you want raw, unadulterated data, Symthic is the holy grail. It breaks down the exact damage models, bullet velocities, recoil patterns, and time-to-kill (TTK) numbers for every single weapon in the game. It is incredibly useful for figuring out which gun statistically fits your playstyle best, rather than just guessing based on how the gun "feels."
- Battlefield Wiki (Fandom): A great resource for reading up on game modes, map layouts, vehicle stats, and the specific unlock requirements for every weapon variant and gadget.
Video Guides and YouTube Channels
- LevelCapGaming: While he covers many shooters, his older Battlefield 1 "In Depth" weapon guides are still incredibly relevant. He breaks down the pros and cons of every gun, explaining exactly what range you should be engaging enemies at.
- Westie: Westie focuses heavily on the meta, map strategy, and high-level gameplay. If you want to understand *why* certain flags are more important than others, or how to properly position yourself in Conquest, watch his Battlefield 1 strategy videos.
- Flakfire Gaming: Flakfire provides excellent, easy-to-digest guides specifically tailored for beginners, covering everything from basic vehicle controls to advanced class tactics.
Community Hubs
- r/Battlefield_One (Reddit): The subreddit is still moderately active and is a great place to ask specific questions, share funny clips, or read discussions about map balance and weapon meta.
- Discord Servers: Searching for "Battlefield 1 Discord" on Disboard.org will yield several active community servers. These are fantastic for finding "squads" to play with. Solo-queuing in this game is brutal; playing with a coordinated squad on voice chat will exponentially increase your win rate and make the game much more enjoyable.
Remember that Battlefield 1 has a notoriously steep learning curve. Your first twenty hours will be a chaotic blur of explosions and sudden deaths. Do not let a 3-15 kill/death ratio discourage you. Focus on the fundamentals: staying near objectives, spotting enemies, and managing your health and ammo. As you internalize the maps and master the rhythm of the weapons, those moments of chaos will transform into the most cinematic, adrenaline-fueled shooter experiences available on the market.


