Ready or Not Beginner's Guide - Tips & Tricks
5-Minute Primer
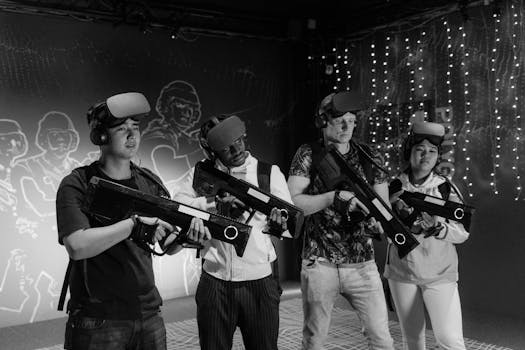
Ready or Not is a punishing, highly realistic tactical first-person shooter that places you in the boots of an elite SWAT officer navigating hostile, high-stakes situations. Unlike arcade shooters where you can sprint through corridors guns blazing, this game demands patience, communication, and a methodical approach. If you treat it like Call of Duty, you will be carried out in a body bag within seconds.
The core philosophy of the game is simple: you are there to neutralize threats and save lives, not to rack up kill counts. The game uses a sophisticated ballistic and health model where a single well-placed bullet can kill you instantly, and you can just as easily accidentally shoot an unarmed civilian. Every doorway is a fatal funnel, and every room could hide an armed suspect lying in wait. Your primary tools are your flashlight, your door wedge, and your voice (via the intuitive radial command menu). Before you even think about firing your weapon, you need to be thinking about how to gain a tactical advantage through positioning and information.
First Hour Checklist
When you first boot up the game, the sheer number of options can be overwhelming. Before you queue up for your first multiplayer mission, run through this checklist to ensure you aren't setting yourself up for failure.
- Complete the Tutorial: This is non-negotiable. The tutorial covers basic movement, breaching, weapon handling, and the all-important suspect compliance system. It takes less than fifteen minutes and saves you from looking foolish in a lobby.
- Tweak Your Mouse Sensitivity: By default, the sensitivity might feel too high. You want your sensitivity low enough that making micro-adjustments for headshots at ten meters is easy, but not so low that turning a corner takes three swipes of your mouse pad.
- Bind "Toggle Lean" Instead of "Hold Lean": Leaning is your primary method of checking corners without exposing your center mass. Holding a key while trying to manage your crosshair placement and weapon recoil is a recipe for finger cramps and death. Bind lean to toggle, and bind your "Toggle Aim Down Sights" as well to save your pinky finger from holding shift constantly.
- Turn Off the Crosshair: In the settings, disable the dynamic crosshair. In a realistic shooter, you should be relying on your actual iron sights or optic to know where your bullets will go. A crosshair encourages hip-firing, which is highly inaccurate and promotes sloppy habits.
- Adjust Audio: Sound is arguably your most vital sense in this game. Ensure your master volume is maxed, and consider boosting the volume of footsteps and gunfire slightly. You need to hear suspects reloading, walking on broken glass, or talking in the next room.

Key Systems Explained
Combat and Ballistics
Combat in Ready or Not is brutal, fast, and unforgiving. There are no health bars or regenerating health. If you take a bullet to the chest without armor, you die. If you take a bullet to the head, you die instantly. Even with heavy armor, sustained fire will put you down. Weapon handling is equally realistic; every gun has distinct recoil patterns, bullet velocities, and damage profiles. A 9mm submachine gun is great for fast clearing but might struggle to drop a heavily armored suspect quickly, while a .308 battle rifle will drop anyone with a single shot but punishes missed shots with heavy recoil and slow follow-up shots. You must learn to fire in controlled, deliberate pairs rather than holding down the trigger.
The Compliance and Command System
This is the mechanic that separates Ready or Not from other shooters. When you encounter a suspect who is not actively shooting at you, your first instinct must be to subdue them, not shoot them. By pressing the middle mouse button (or your bound command key), you bring up a radial menu. Pointing at a suspect and selecting "Drop your weapon!" or "Get on the ground!" initiates a compliance sequence.
Suspects have a hidden "morale" stat. If you catch them off guard, shine a bright light in their eyes, or have multiple officers pointing weapons at them, they are highly likely to surrender. If they are cornered, heavily armed, or high on drugs, they may choose to fight. If a suspect complies, you must zip-tie them. Un-tied suspects will pick their weapons back up and shoot you in the back. Furthermore, you cannot cuff a suspect while aiming down sights; you must safely lower your weapon to perform the arrest.
Officer Equipment and Loadouts
Your loadout dictates your role in the squad. You have a primary weapon, a secondary pistol (which you should almost always switch to when clearing tight spaces), and a suite of tactical equipment. Understanding your tools is critical:
- Door Wedges: The most underrated tool in the game. Placing a wedge under a door prevents it from being opened. Use this on side doors to lock down hallways and prevent suspects from sneaking up behind you while your squad breaches the main entrance.
- Flashbangs vs. Stingers: Flashbangs create a blinding flash and deafening bang, disorienting suspects. Stingers (flashbangs filled with rubber balls) add a concussive physical impact that can knock suspects down. Both are excellent for room clearing.
- CS Gas / Pepper Spray: Non-lethal area-of-effect tools. Throw them into a room, wait for the coughing to start, and then breach. Suspects affected by gas will stumble out or be too busy choking to aim their weapons.
- Mirrors / Camera: Used to look under doors or around corners without exposing your head. Intelligence is your best armor.
- Shield: Forwards facing players can equip a ballistic shield. It makes you slow and limits you to a pistol, but it allows you to safely advance down fatal funnels and absorb gunfire while your team shoots over your shoulder.
Progression and Evaluation
At the end of every mission, you receive a letter grade ranging from S to F. Your score is not based on how fast you finished, but on how cleanly you executed the operation. Points are deducted for civilian casualties, illegal killings (shooting unarmed suspects), or failing to secure evidence. Points are added for arresting suspects, securing weapons, and keeping your team alive. An S-rank requires near-perfect play: zero casualties, all suspects arrested, and all evidence bagged. While you don't need to chase S-ranks to enjoy the game, the evaluation system forces you to play tactically rather than violently.
Build / Character Choices
While there isn't a traditional RPG skill tree, your choice of armor and weapons functions exactly like a character build. As a beginner, you need to find the balance between protection and mobility.
Armor Selection
The game offers light, medium, and heavy armor, plus different helmet options. Heavy armor might seem like the best choice for a beginner—it allows you to survive multiple rifle shots. However, heavy armor severely restricts your movement speed, makes you incredibly loud when walking, and slows down your aiming speed. In a game where a split-second reaction determines life or death, being slow is often a death sentence.
Light armor is highly recommended for beginners. It allows you to move quickly, clear rooms rapidly, and reset your crosshair after moving much faster. You will die if you get shot, but the philosophy here is "don't get shot" rather than "tank the shot." Play carefully, use cover, and rely on speed and precision rather than armor plating.
Weapon Recommendations
Do not bring a sniper rifle or a heavy machine gun into a standard mission. You are clearing houses, not fighting in open fields.
- Primary Weapon: Start with a reliable Assault Rifle (AR) like the M4A1 or the AK-74. Equip it with a red dot sight (for fast target acquisition), a vertical grip (to control vertical recoil), and a flashlight (non-negotiable). Keep the barrel standard or slightly shortened for maneuverability. Set the firing mode to semi-automatic or two-round burst. Full-auto is a trap that wastes ammo and destroys your accuracy.
- Secondary Weapon: Your pistol is not a last resort; it is a primary tool. Bring a high-capacity 9mm pistol like the Glock 19 or the P226. You should be holding your pistol for 70% of the mission, only pulling out your rifle when you know you are engaging a target at medium-to-long range or dealing with an armored suspect.
- Utility Slot: Bring a combination of wedges, flashbangs, and a mirror. Drop the extra ammo pouches; if you are firing more than four magazines in a single mission, you are doing something fundamentally wrong.
Pitfalls to Dodge
New players are incredibly predictable. If you want to survive your first few dozen missions, you must actively resist the following rookie errors.
- Silhouette Syndrome (Hugging Doorways): This is the number one killer of new players. When you open a door, do not stand directly in the doorway. A doorway frames your body perfectly for anyone waiting inside. Instead, "slice the pie." Stand to the side of the door, use your lean keys to slowly edge your vision into the room, and clear it bit by bit. Only step through the doorway when you are certain the immediate corner is clear.
- Trigger Discipline Failures: Do not shoot at shadows. Do not shoot at people holding cell phones or wallets. Do not shoot suspects who are running away with their backs turned unless you have explicitly identified a weapon in their hand. If you accidentally shoot a civilian or an unarmed suspect, you will fail the mission, get kicked from multiplayer lobbies, and lose your rank. Take the extra half-second to verify your target.
- Ignoring the "Fatal Funnel": A fatal funnel is any narrow space where your squad is forced to line up, such as a hallway or a doorway. If you push into a fatal funnel without throwing a flashbang or using a shield, the first person in dies, the second person dies, and the third person gets suppressed. Always stack up, prep your grenades, and breach dynamically to overwhelm the defenders.
- Wandering Solo: Lone wolfing is the fastest way to get eliminated. Even if you have a bad team, staying within line of sight of at least one other officer means you have crossfire coverage. If you get pinned down and downed, a nearby teammate can revive you. If you are alone in a basement, you are simply dead.
- Forgetting to Secure Weapons: After you cuff a suspect, look at the ground. There is usually a gun right next to them. If you leave it there, and that suspect somehow gets loose (or another suspect walks by), that gun will be used against you. Walk over the weapon to put it in an evidence bag. This also boosts your end-of-mission score.
- Tunnel Vision: When engaging a suspect, beginners tend to stare exclusively at the threat until it falls. This gets you killed by the suspect's friend hiding in the corner. After firing your controlled pairs, immediately snap your vision to your next angle of cover. Maintain a 360-degree mental awareness at all times.
- Calling Out the Wrong Information: In multiplayer, communication is vital. If you see a suspect, don't just yell "Suspect!" Yell "Suspect, top left, behind the desk!" Bad callouts cause teammates to aim at the wrong spot and die. Be specific, be loud, and be calm.
Next Steps
Once you have internalized the basics—managing your loadout, slicing the pie, and executing the compliance system—it is time to dive into the specific mechanics that will turn you from a competent officer into a true team leader.
Master Solo Play
Before jumping into multiplayer with randoms, spend time playing solo with the AI squad. The AI in Ready or Not is surprisingly capable if you know how to command them. You can order them to breach a room, throw a specific grenade, and hold a position while you flank from the outside. Use solo mode to learn the layouts of the maps. Maps like "Ranch" or "Carrier" are incredibly complex, and learning the flow of the buildings without the pressure of other human players is invaluable. Practice commanding the AI to clear dangerous rooms while you cover the hallway.
Learn the Maps Asymmetrically
Stop thinking of maps as a series of rooms and start thinking of them as a series of sectors. Before you breach, look at the tactical map. Identify where the main objective is, then identify all the alternate routes. If the front door is a death trap, can you go through a side window? Can you breach the ceiling? High-level play involves approaching the objective from an angle the suspects aren't watching. When playing solo or with friends, practice entering buildings from non-traditional entry points to catch suspects off guard.
Move on to Multiplayer Roles
When you finally feel comfortable, transition into multiplayer. In multiplayer, you should adopt a specific role within your squad of five. If you have a shield, take point. If you have a mirror gun or a ballistic camera, take the role of "scout" and lead the stack, feeding information to the team. If you have a ballistic breaching shotgun, take the role of "breacher" and focus on blowing hinges off doors. A coordinated squad where everyone knows their job is infinitely more effective than five individuals doing their own thing.
Embrace the Non-Lethal Playstyle
Eventually, challenge yourself to complete missions using entirely non-lethal or less-lethal tactics. Equip a beanbag shotgun, a taser, CS gas, and pepper balls. This completely changes the pacing of the game. You can no longer rely on the instant threat removal of a bullet. You must isolate suspects, gas them out, and coordinate with your team to overwhelm them before they can react. It is incredibly stressful but immensely rewarding, and it virtually guarantees an S-rank if executed perfectly.
Ready or Not is a game that refuses to hold your hand. You will fail missions. You will accidentally shoot civilians. You will get frustrated when a suspect hiding in a dark closet one-taps you as you walk past. But when everything clicks—when your squad moves in perfect synchronization, flashbangs pop in perfect sequence, and you clear a heavily fortified drug den without a single shot fired—you will experience a level of tactical satisfaction that no other shooter on the market can provide. Take it slow, communicate relentlessly, and always watch your corners.