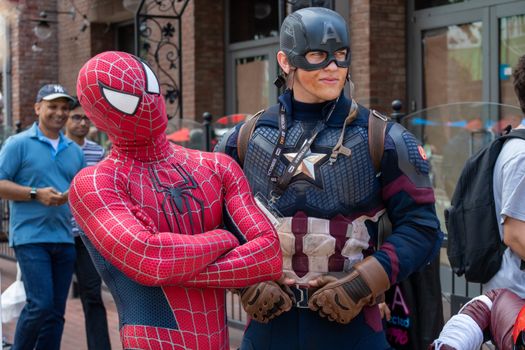
Marvel's Spider-Man Remastered Tier List - Best Characters & Builds
Tier List Overview
In Marvel's Spider-Man Remastered, Peter Parker’s arsenal is defined not by traditional firearms or melee swords, but by his incredibly diverse suite of Spider-Suits and their associated Suit Powers. Because the game does not feature equippable weapons in a traditional sense, the most relevant and impactful way to rank progression and combat options is by evaluating the best Suit Powers and Gadget combinations—effectively, the best "builds" in the game.
Every Suit in the game is purely cosmetic once unlocked, meaning the true meta revolves around selecting the right Suit Power and pairing it with the optimal Gadget to synergize with your chosen playstyle. Whether you prefer stealth takedowns, crowd control, ground-and-pound melee brawling, or maintaining distance with web-based combos, your build will dictate your success on the Ultimate difficulty. This tier list ranks the absolute best Suit Powers and their optimal Gadget pairings, evaluating them based on raw damage output, crowd control utility, synergy with the game's core combat loop, and effectiveness against the game's toughest challenges, including the DLC expansions on New Game Plus.
S Tier
The S Tier represents the absolute pinnacle of Marvel's Spider-Man Remastered’s combat loop. These builds are not just good; they fundamentally break the game's balance in your favor. They offer unmatched crowd control, massive damage numbers, and incredibly low cooldowns, allowing you to effortlessly chain combos and clear out entire bases of heavily armed enemies without ever taking damage.
Electric Web + Impact Web Build
This is universally considered the most overpowered build in the entire game, and for good reason. The Electric Web Suit Power fires a concentrated bolt of electricity that arcs between enemies, stunning them instantly and leaving them vulnerable to ground attacks. What pushes this into S Tier is its intrinsic synergy with the game's mechanics. Stunning an enemy with Electric Web automatically triggers the "Concussive Blast" base skill (unlocked via the Skill tree), which blasts nearby enemies away. When paired with the Impact Web Gadget—which instantly takes down lesser enemies and heavily damages elites—you create an infinite loop of crowd control.
- Why it works: You can hit a crowd with Electric Web, watch the Concussive Blast knock them into the air, and then instantly snipe them out of the sky with Impact Webs before they even hit the ground. If there is a boss or heavily armored enemy left, a single L1+Circle ground strike after the stun will chunk half their health bar.
- Synergy: Invest in the "Web Blossom" and "Concussive Force" skill tree nodes to maximize the area-of-effect stun radius, turning a single button press into a room-clearing nuke.
Bio Electric Punch + Web Bomb Build
If you prefer to be in the thick of the action, punching enemies directly in the face rather than playing keep-away, the Bio Electric Punch is your ultimate tool. This Suit Power electrifies Spidey's fists, allowing his next few melee attacks to deal massive electric damage and chain lightning to surrounding foes. The sheer damage-per-second (DPS) of this power is unmatched by any other melee-focused ability.
- Why it works: Activating Bio Electric Punch turns Spider-Man into a blender. Every punch generatescombo meter, triggers electric chain damage, and keeps enemies permanently stunned. It completely negates the risk of being interrupted during melee combos because anything that gets close is instantly electrocuted.
- Synergy: Pair this with the Web Bomb Gadget. If you ever get overwhelmed and need to create breathing room, throw a Web Bomb to root everyone in place, then leap in with Bio Electric Punch. The Web Bomb also applies a "Webbed" status, which certain skill tree nodes convert into additional electric damage, creating a devastating one-two punch.
Spider Bro + Suspension Matrix Build
Spider Bro is a Suit Power that summons a tiny spider drone that floats behind Peter, automatically firing concussive blasts at enemies periodically. While it might sound like a minor gimmick, the drone's AI is incredibly aggressive, and its damage output is shockingly high. It effectively gives you a passive DPS aura that whittles down enemy health while you focus on dodging, parrying, or executing other combos.
- Why it works: Spider Bro excels because it requires zero resource management. You activate it, and it does its job. It is particularly devastating during boss fights where you might be too busy dodging massive area-of-effect attacks to get your own hits in. The drone chips away at the boss's health bar effortlessly.
- Synergy: Pair Spider Bro with the Suspension Matrix Gadget. Suspension Matrix hangs multiple enemies upside down from the ceiling, completely removing them from the fight temporarily. By suspending the fodder enemies, you ensure that Spider Bro's targeting algorithm locks onto the elite, heavily armored enemies, maximizing your damage output where it matters most.
A Tier
A Tier builds are exceptionally strong, reliable, and will carry you through the main game and DLC without any issues. They lack the infinite combo potential or the raw, game-breaking synergy of the S Tier, but they are incredibly consistent and form the backbone of many advanced players' arsenals.
Iron Arms + Ripper Build
Unlocked during the Silver Sable storyline, the Iron Arms Suit Power equips Peter with massive, metallic arms that drastically increase his melee range and damage for a short duration. Every punch feels heavy and satisfying, capable of launching enemies across the screen and breaking enemy guards with ease.
- Why it works: Iron Arms is the ultimate anti-armor build. Some of the most annoying enemies in the game (like Sable特工 or heavily shielded brutes) require you to duck under their attacks or vault over them to break their guard. Iron Arms simply powers through their guard, allowing you to stun them with brute force.
- Synergy: The Ripper Gadget fires a razor-sharp projectile that severs enemy weapon tethers and causes them to drop their guns. By disarming ranged enemies with Ripper and then engaging the remaining armored targets with Iron Arms, you effectively neutralize the two biggest threats in any combat encounter simultaneously.
Resupply + Spider Drone Build
The Resupply Suit Power is unique because it doesn't deal direct damage. Instead, it instantly resets the cooldowns of all your Gadgets and instantly refills your Focus meter. In a game where Gadgets are your primary method of crowd control, getting a free reload of all your tools is incredibly valuable.
- Why it works: Resupply enables "burst" gameplay. You can throw out all your Web Bombs, Impact Webs, and Suspension Matrices to absolutely wreck a room, and then hit Resupply to do it all over again. Furthermore, the instant Focus generation allows you to immediately execute a heal or a brutal takedown on an elite enemy.
- Synergy: Pair this with the Spider Drone Gadget. The Spider Drone has a long cooldown but deals excellent area-of-effect damage over time. By throwing out a Drone, waiting for it to explode, and then using Resupply to throw a second Drone immediately, you can consistently overlay massive AoE damage fields on top of enemy groups.
Bullet Shield + Concussion Blast Build
For players who prefer a defensive, counter-attacking playstyle, the Bullet Shield Suit Power is a godsend. It creates a frontal shield of hardened webbing that blocks all incoming ranged attacks for a few seconds, automatically reflecting the projectiles back at the shooters.
- Why it works: In the later stages of the game, especially in the DLC, you are frequently swarmed by snipers, rocket launcher enemies, and mini-gunners. Trying to close the distance on these enemies can be a nightmare. Bullet Shield allows you to casually walk through a hail of gunfire, killing the shooters with their own reflected bullets.
- Synergy: Use the Concussion Blast Gadget to knock enemies backward just as you activate Bullet Shield. This pushes melee attackers out of your face, ensuring you only have to deal with the ranged attackers whose bullets you are reflecting.
B Tier
B Tier options are perfectly viable but require a bit more manual input, precise timing, or specific scenario setups to shine. They are good, but they are outclassed by the tools available in the higher tiers.
Adrenaline Pump + Shock Wave Build
Adrenaline Pump temporarily increases your movement speed, attack speed, and makes your webs stronger. It is a solid, jack-of-all-trades buff that makes Spider-Man feel incredibly agile.
- Why it’s B Tier: While the speed boost is fun, it doesn't offer the hard crowd control or burst damage of S or A Tier powers. The increased attack speed is marginally helpful, but Spider-Man's base combat is already so fast that the difference is barely noticeable in the heat of battle. It’s a great "flavor" power, but mechanically inferior.
- Synergy: Shock Wave gives you a decent AoE knockback. Using Adrenaline Pump to quickly close gaps and then Shock Wave to push everyone away is a solid strategy, but it lacks the "oomph" required to quickly end fights on higher difficulties.
Blaze + Trip Mine Build
Blaze engulfs Spidey in fire, causing his attacks to ignite enemies and deal damage over time. It looks incredibly cool and fits the aggressive melee playstyle perfectly.
- Why it’s B Tier: The damage-over-time (DoT) effect in Marvel's Spider-Man is notoriously slow. Enemies will often die to your basic melee attacks long before the fire DoT actually kills them. Furthermore, applying fire doesn't have the same hard-stun utility that electricity does, meaning enemies can still shoot you while they are burning.
- Synergy: Trip Mines deal explosive damage and can be stuck to walls or enemies. Blazing an enemy and then sticking a Trip Mine to them creates a makeshift firebomb, but the setup time is too long to be practical when you are being shot at from six different directions.
Crowd Pleaser + Web Blossom Build
Crowd Pleaser is a cinematic power that has Spider-Man vault off an enemy's head, striking everyone in a close radius. It is essentially a free, localized area-of-effect attack.
- Why it’s B Tier: The radius is surprisingly small, and the damage is underwhelming compared to Electric Web. It also requires you to be in extremely close proximity to enemies to trigger it, which puts you at unnecessary risk of taking a hit from an off-screen sniper.
- Synergy: Pairing it with the Web Blossom gadget (which pulls enemies into a central point) makes sense on paper, but Web Blossom is better saved for setting up Impact Web snipes or Electric Web chains rather than wasting it on a mediocre melee AoE.
C Tier
C Tier consists of Suit Powers that are either completely outclassed by other options, mechanically clunky, or actively detrimental to your combat flow. You should avoid using these on higher difficulties.
Quadruple Web + Holo Decoy Build
Quadruple Web binds an enemy to the ground with four heavy-duty webs, rooting them in place. On paper, this sounds like a weaker version of Web Bomb. In practice, it is exactly that—but worse.
- Why it’s C Tier: It only affects a single target. In a game where you are routinely fighting ten to fifteen enemies at once, using a Suit Power slot on a single-target root is a massive waste. Furthermore, rooted enemies can still shoot you if you are in their line of sight, making it a poor defensive tool.
- Synergy: The Holo Decoy distracts enemies for a few seconds. Distracting enemies is inherently a stealth mechanic, but Quadruple Web makes a loud noise and alerts everyone in the room. Using them together contradicts your own playstyle, resulting in a messy, ineffective combat scenario.
Spirit Fire + Spider-Drone Build
Spirit Fire is essentially a reskin of Blaze with slightly different visual effects, trading fire for a glowing purple spiritual energy. It suffers from the exact same problems as Blaze but is ranked slightly lower due to its implementation.
- Why it’s C Tier: The damage-over-time is negligible, it provides no crowd control, and it eats up a Suit Power slot that could be used for the infinitely superior Electric Web. It exists purely as a novelty tied to a specific suit unlock.
- Synergy: As mentioned in the A Tier, Spider-Drone is great, but it cannot carry a bad Suit Power. You are better off using Spider-Drone with Resupply or Electric Web to actually capitalize on the drone's damage output.
Anti-Ock Suit Power + Any Gadget
The final Suit Power you unlock, tied to the Anti-Ock suit, is a massively powerful, concentrated blast of kinetic energy that instantly defeats lesser enemies and deals massive damage to bosses. So, why is it in C Tier?
- Why it’s C Tier: It has arguably the longest cooldown in the entire game, and it is locked behind completing the main story. By the time you unlock it, there is almost nothing left to use it on except for random street crimes and the Ultimate difficulty DLC. If this power had a shorter cooldown, it would be S Tier, but as a tool you can only use effectively for the last hour of the game, it is practically irrelevant for 95% of your playtime.
- Synergy: It doesn't matter what Gadget you pair this with, as the Suit Power is meant to be a standalone "win button" that you press when you are bored of fighting. It requires no synergy because it inherently ignores the game's combat loop.
How to Use This Tier List
Understanding this tier list requires a bit of context regarding how Marvel's Spider-Man Remastered handles difficulty scaling and player progression. The game operates on a system of crowd control and burst damage. If you allow enemies to stay alive too long, they will surround you, attack simultaneously (breaking your guard), and overwhelm your health bar. Therefore, builds that focus on stuns (Electricity) and instant eliminations (Impact Webs) naturally rise to the top.
It is also important to note how the game's Skill Tree interacts with these builds. The Skill Tree is not just a passive stat dump; it actively modifies the behavior of your gadgets and Suit Powers. For example, the S Tier Electric Web build only becomes truly broken once you invest Skill Points into the "Concussive Force" and "Battle Focus" branches. If you try to run an S Tier build without the corresponding Skill Tree investments, it will perform more like an A or B Tier build. Always read the skill descriptions to see which abilities enhance the gadgets you plan to use.
Furthermore, consider your chosen difficulty. If you are playing on "Friendly Neighborhood" or "Amazing" difficulty, the C Tier builds are perfectly fine. The game is forgiving enough that you can use Spirit Fire or Quadruple Web just because you think they look cool, and you will still easily win. However, if you are playing on "Ultimate" difficulty—or attempting the brutally hard New Game Plus "Spectacular" trophy, which requires you to beat the game at the highest difficulty without upgrading your base stats—S Tier and A Tier builds are mandatory. On Ultimate difficulty, a single mistake can kill you, making the passive safety of Spider Bro or the hard stuns of Electric Web your only reliable lifelines.
Finally, remember that "meta" does not mean "mandatory for fun." Marvel's Spider-Man Remastered has one of the most fluid, satisfying traversal and combat systems in modern gaming. The core act of swinging, dodging, and punching is inherently enjoyable. If your favorite Spider-Man suit has a B Tier or C Tier power attached to it, you should absolutely still use it for your initial playthrough. This tier list is designed to provide a mathematical, objective breakdown of the game's underlying mechanics for players looking to optimize their performance, min-max their damage output, or conquer the highest tiers of end-game content without pulling their hair out. Choose the build that best fits your personal tolerance for risk, but never forget that, at the end of the day, you are Spider-Man—and that is a power all its own.