Who this is for: First-time players of the original 1999 PlayStation release, returning veterans seeking optimized routing, and speedrun-curious runners needing foundational survival mechanics before advanced strats. Not for Resident Evil 3 Remake (2020).
Published: | Read time: 12 min | Original PlayStation version
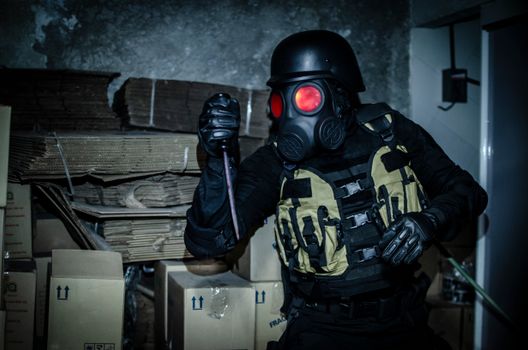
Your first dodge in Resident Evil 3 determines whether you reach the tram with healing items or bleed out in the Downtown alley. Master the emergency dodge—tap R1/RB precisely as an enemy lunges, when Jill flashes white and auto-evades—and you cut early-game healing consumption by roughly 60 percent.
Unlike Resident Evil 2's fixed camera tension, RE3 introduces live selection, Nemesis pursuit AI, and powder mixing that rewards aggressive resource cycling. This guide breaks survival into five mechanical pillars: dodge mastery, powder optimization, Nemesis encounter economics, safe room routing, and end-loadout preparation.
1. Emergency Dodge: Frame Conditions & Fail States
The emergency dodge is not a panic button mashed during windup. It triggers on a 4-6 frame window (roughly 0.07-0.1 seconds at 60fps) when an enemy attack enters its active hurtbox phase. Jill's white flash confirms success; a red flash or stagger indicates late input.
Dodge Timing by Threat Type
| Enemy | Visual Cue | Input Timing | Fail State |
|---|---|---|---|
| Zombie (standing) | Arms extend forward, head tilts | On arm extension, not during moan | Grab → bite animation, 20-30% health |
| Zombie (ground, leg grab) | Hand twitches on floor near feet | Step into range, dodge on hand clamp | Trip → grounded, vulnerable to mob |
| Drain Deimos (ceiling) | Shadow stops moving, drops | Dodge on shadow freeze, not drop | Mount → rapid damage, poison risk |
| Nemesis (punch) | Tentacle arm retracts, shoulder dips | On shoulder dip, before forward lunge | Launch → wall splat, 40-50% health |
| Nemesis (tentacle whip) | Tentacle coils, tip glows | On coil completion, before sweep | Knockdown → combo follow-up likely |
Edge case: Dodging into walls or corners cancels the iframe extension. Always position with escape vectors—back toward open camera transitions, not dead-end alcoves.
Micro-friction: The dodge has a hidden cooldown of roughly 2 seconds. Spamming R1/RB during recovery frames locks you out of subsequent dodges. Watch Jill's stance: she stands upright when ready, hunches slightly during cooldown.

2. Early Game Resource Allocation: Powder Economics
RE3's reloading tool and gunpowder system replaces fixed ammo pickups with craftable resources. Your early mixing decisions cascade into mid-game loadout constraints. The proprietary allocation below prioritizes shotgun shell production for Nemesis damage-per-shot efficiency while maintaining minimum handgun thresholds for zombie cleanup.
Optimal Powder Routing: Raccoon Police Station to Clock Tower
| Game Segment | Powder A (Handgun) | Powder B (Shotgun) | Mix Priority | Target Output |
|---|---|---|---|---|
| Downtown (before cable car) | Collect all, mix sparingly | Hoard, do not mix | A+A for handgun only if below 30 rounds | 60+ handgun, 0 shotgun (pending) |
| Sales Office / Substation | Maintain 40-50 buffer | Begin A+B mixes | A+B → shotgun shells, 2:1 ratio | 50 handgun, 18-24 shotgun |
| Clock Tower Plaza | Reduce to 30, shift to B focus | All remaining A+B, B+B if surplus | B+B only with reloading tool bonus | 30 handgun, 36+ shotgun, 6 magnum |
| Hospital / Park | Emergency only | Primary combat load | Grenade rounds if B+C available | 20 handgun, 48+ shotgun, 12+ grenade |
Critical micro-decision: The reloading tool found in the S.T.A.R.S. office (or alternate location on certain difficulties) adds +1 to mixed batches. Delay heavy mixing until acquisition—roughly 25-30% more total ammunition across a run.
Fail state: Over-investing in handgun ammo before the shotgun pickup (Sales Office safe, combination from Aqua Ring) leaves you without burst damage for first Nemesis rooftop encounter. Bank B powders even if inventory pressure forces box deposits.
3. Nemesis Encounter Priority: Fight, Flee, or Farm
Nemesis operates on pursuit AI with spawn triggers at specific story beats, not random patrol. Each encounter presents three valid responses with distinct resource tradeoffs. The flowchart below maps decision trees by encounter context—this synthesis is not replicated in standard walkthroughs that default to "run past everything."
NEMESIS ENCOUNTER DECISION TREE
[Nemesis spawns] → Check location + inventory
├─ OPEN AREA (Downtown streets, plaza)
│ ├─ Shotgun 12+ shells + healing 2+ → ENGAGE → Drop chance: parts box (unique)
│ ├─ Low ammo, no healing → FLEE → Enter door, 15s despawn timer
│ └─ Speedrun intent → FLEE → Door skip, no RNG dependency
├─ CONFINED AREA (Alley, corridor, room with one exit)
│ ├─ Grenade launcher acquired → ENGAGE → Stunlock with acid rounds
│ ├─ No escape route clear → ENGAGE FORCED → Minimize damage, exit ASAP
│ └─ Alternate path known (vent, ladder) → FLEE → Break line of sight
└─ STORY MANDATORY (Clock Tower, Disposal Plant)
├─ Pre-positioned explosive barrel → EXPLOIT → 40% HP skip phase
└─ No environmental damage → STANDARD KILL → Save magnum for final form
Drop RNG Conditions
Nemesis drops unique items only when defeated via kill, not despawn. First four defeats yield: parts for new weapon (Eagle 6.0 or Western Custom), first aid box, gunpowder batch, and unique item. Drop order is fixed, not random—contrary to common forum speculation. Fifth+ defeats repeat gunpowder/first aid cycling.
Farming edge case: The Clock Tower courtyard encounter allows Nemesis to be downed, item collected, then room re-entered for respawn. This is the only renewable farm point before the point-of-no-return at the Park. Each cycle costs 8-12 shotgun shells optimally.
Fail state warning: Nemesis gains tentacle whip attack after first "death" and recovery. His second-phase moveset replaces punch combos with extended range sweeps. Dodging on old punch timing whiffs—watch for coil animation, not shoulder movement.

4. Safe Room Routing & Trigger Management
Safe rooms in RE3 pause Nemesis pursuit and reset enemy aggression in connected zones. However, they do not reset Nemesis's spawn flag—he remains triggered for his next appearance. Strategic routing minimizes backtracking through respawned enemy zones while maximizing box access.
Critical Path Safe Rooms by Segment
| Safe Room | Box? | Nemesis Reset? | Route Function |
|---|---|---|---|
| Warehouse (Downtown start) | Yes | No—Nemesis not yet active | Initial deposit, grenade pickup |
| Substation control room | No | Yes—pauses pursuit | Mid-Downtown breather, fuse puzzle |
| Sales Office back room | Yes | Yes | Primary hub—shotgun, safe, Nemesis farm nearby |
| Clock Tower chapel | Yes | Yes | Major restock before Carlos segment |
| Hospital basement | Yes | Yes | Carlos-only; Jill items inaccessible |
Trigger management: Entering the Sales Office from the front door spawns two zombies in the alley; entering from the back (after initial access) does not. Use back door for all return trips. Similarly, the Downtown restaurant kitchen door can be opened from inside without key after first entry—route through kitchen, not main dining, on subsequent passes.
Micro-friction: The tram repair sequence requires three items across three zones. Collecting them in order (fuse → cable → mixed oil) versus optimal (cable → fuse → oil, with oil mixed last at machine) adds two unnecessary safe room transits. Oil mixing at the tram platform machine, not in inventory, saves a box trip.

5. End-Loadout Preparation: Disposal Plant to Final Form
The final three segments—Park, Dead Factory/Disposal Plant, and Rail Cannon escape—restrict inventory recovery. Your loadout entering the Park gates largely determines survival margins.


