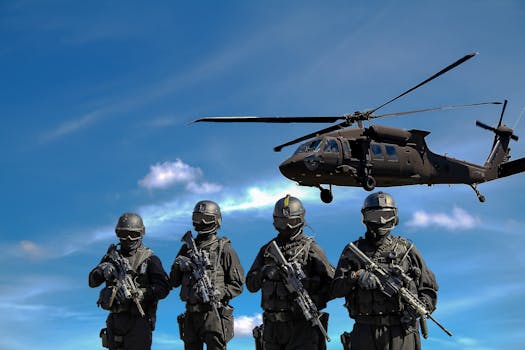
Tier List Overview
In the chaotic, gore-soaked world of John Carpenter's Toxic Commando, surviving the mutated hordes requires more than just a heavy trigger finger. With a roster of distinct Commandos, a massive arsenal of over-the-top weaponry, and a deep perk system, the difference between a flawless extraction and a total squad wipe usually comes down to your build. Because the game’s meta revolves around synergizing a specific Commando’s intrinsic abilities with the right firepower and passive upgrades, ranking individual weapons or characters in a vacuum doesn’t tell the whole story. Therefore, this tier list ranks the best overall builds in the game—combining the Commando, their ideal weapon loadout, and the specific perks needed to make the combo sing.
The rankings below are based on high-difficulty missions, boss TTK (time-to-kill), crowd-control capabilities, and overall synergy. Whether you are diving into the campaign's hardest nightmares or pushing through the endless waves of the PvE horde mode, these are the builds that will keep your squad alive when the toxins hit the fan.
S Tier
S Tier builds are the undisputed meta of Toxic Commando. These loadouts break the game's difficulty curve, offering near-infinite survivability, massive area-of-effect damage, or the ability to delete bosses before their mechanics can even become a threat. If your squad has one or two of these builds, your chances of success skyrocket.
The "Unstoppable Juggernaut" (Dr. Assault + Heavy Minigun + Tank Perks)
Dr. Assault is already widely considered the best Commando in the game due to his passive health regeneration and damage resistance, but when you spec him entirely into durability and sustained fire, he becomes an absolute raid boss. Armed with the Heavy Minigun, this build turns the normally fragile Commando into a mobile tank.
- The Weapon: The Heavy Minigun features a wind-up time but boasts the highest sustained DPS of any primary weapon. When paired with Dr. Assault, the wind-up is practically ignored because he can safely absorb hits while the barrels spin.
- The Perks: Stack "Iron Lungs" (reduces movement penalty while shooting), "Vampiric tendencies" (leech health on elite kills), and "Shock Absorbers" (flat damage reduction).
- Why it’s S Tier: This build trivializes horde waves. You simply stand in a doorway, hold the trigger, and watch the bodies pile up. The combination of Dr. Assault's base regen and the Vampiric perk means you out-heal almost all incoming trash mob damage. You become the ultimate anchor for your team.
The "Toxic Chef" (Toxie + Toxic Sprayer + DoT Synergy)
If the Juggernaut is about brute force, the Toxic Chef is about passive, agonizing death. Toxie’s innate ability to enhance poison damage interacts with the game's Damage-over-Time (DoT) mechanics in ways the developers likely didn't fully anticipate. By utilizing the Toxic Sprayer and a specific perk loadout, Toxie can clear entire maps without ever firing a traditional bullet.
- The Weapon: The Toxic Sprayer coats the environment and enemies in a lingering acid. While its upfront damage is low, the status effect duration is incredibly long.
- The Perks: "Miasma" (increases DoT tick speed), "Chain Reaction" (DoT explosions on killed enemies), and "Toxic Immunity" (self-explanatory).
- Why it’s S Tier: The Chain Reaction perk is the star here. Once a horde is coated, all Toxie has to do is kill one single basic mutant. The resulting poison explosion triggers Chain Reaction, which kills the next enemy, causing another explosion, resulting in a massive, screen-clearing chain reaction of toxic goo. It is the most efficient trash-clear build in the game.
A Tier
A Tier builds are exceptionally strong, reliable, and capable of carrying a team through almost any content. They might lack the absolute broken synergy of S Tier, or they might require slightly more mechanical skill to execute perfectly, but you will never feel underpowered running one of these loadouts.
The "Precision Executioner" (Solo + Heavy Sniper + Crit Perks)
Solo is the edgy, silent killer of the roster, sporting a cloaking device and enhanced critical hit chances. The Precision Executioner build leans entirely into single-target deletion, making Solo the premier boss-killer in the game.
- The Weapon: The Anti-Materiel Rifle (Heavy Sniper). It fires incredibly slowly but deals massive headshot multiplier damage.
- The Perks: "Deadeye" (further increases crit damage), "Cloak and Dagger" (increases movement speed and reload speed while cloaked), and "Weak Spot Hunter" (brief damage boost after a critical hit).
- Why it’s A Tier: Boss fights in Toxic Commando can drag on and become chaotic. This build ends them quickly. By cloaking, lining up a headshot, and immediately reloading, Solo can safely dump massive damage from across the map. It drops down to A Tier simply because it struggles during dense horde waves where lining up shots is difficult, requiring a supportive team to handle the trash mobs.
The "Boom Buggy Baron" (Wheelz + Dual Rocket Launchers + Splash Perks)
Wheelz brings vehicular chaos to the battlefield, and his passive ability to reduce explosive self-damage allows him to use weapons that would normally suicide any other Commando. The Boom Buggy Baron build maximizes area-of-effect explosions to stunning effect.
- The Weapon: Dual Rocket Launchers. Lower damage per rocket than a single large launcher, but a massively increased fire rate.
- The Perks: "Demolition Expert" (increased blast radius), "Collateral Damage" (grenades and rockets deal 15% more damage to enemies already on fire), and "Pyromaniac" (chance to ignite on explosive hit).
- Why it’s A Tier: This build is pure, unadulterated fun and incredibly effective at crowd control. The splash radius gets so large that you don't even need to aim—just shoot at the floor near a cluster of enemies. It misses S Tier because running out of rocket ammo is a genuine threat, and you become entirely useless if a suppressor field disables your explosives.
The "Battery Sentinel" (Lucky + Tesla Cannon + Team-Utility Perks)
Lucky is the team player of the group, offering utility that scales incredibly well with co-op play. The Battery Sentinel build turns Lucky into a crowd-control machine while simultaneously buffing the squad's damage output.
- The Weapon: The Tesla Cannon fires a beam of electricity that chains between nearby enemies, stunning them briefly.
- The Perks: "Conductive Metal" (chain lightning jumps to two additional targets), "Ammo Scavenger" (generates ammo for nearby allies on elite kills), and "Overcharge" (stunned enemies take 20% increased damage).
- Why it’s A Tier: In a coordinated team, this build is an S Tier enabler. The Tesla Cannon locks down dangerous elites, and the Overcharge perk allows the rest of the team (like the Solo sniper or Toxie) to melt them instantly. However, because it relies heavily on teammates to capitalize on the debuffs, its standalone power drops it to A Tier for solo-queue players.
B Tier
B Tier builds are perfectly viable and will get the job done, but they suffer from notable flaws. They might be too ammo-hungry, require too much micromanagement, or simply be outclassed by the options in the tiers above. Use these if you want a change of pace or if your preferred playstyle demands it.
The "Run-and-Gun Striker" (Rookie + Assault Rifle + Mobility Perks)
Rookie is the vanilla Commando, offering no innate weaknesses but no standout strengths either. This build attempts to maximize mobility and mid-range DPS using standard assault rifles.
- The Weapon: The Standard Issue Assault Rifle or the Tactical SMG.
- The Perks: "Adrenaline Rush" (movement speed increases after getting a kill), "Quick Hands" (faster reload), and "Extended Mags."
- Why it’s B Tier: It works exactly as advertised: you run fast and shoot guns. However, in the late game, basic bullet damage falls off hard against heavily armored mutants. You will spend half your time unloading into a single elite's armor plate, whereas an S or A tier build would have handled it instantly. It’s a safe, boring, but functional choice.
The "Trapper" (Scout + Shotgun + Trap Perks)
Scout excels at setting up defensive perimeters, but the AI in Toxic Commando rarely obliges by walking exactly where you want them to.
- The Weapon: The Pump Shotgun for close-range defense when traps fail.
- The Perks: "Tripwire Tinkerer" (increases trap range), "Sentry Protocol" (deployable turret deals more damage), and "Close Quarters Combat" (shotgun damage increased when near traps).
- Why it’s B Tier: Setting up a kill zone takes precious time during missions, and horde spawns are often too erratic or widespread for traps to be consistently effective. The shotgun provides a decent fallback, making the build "okay," but it lacks the flexibility of the higher-tier options.

C Tier
C Tier builds are the definition of underperforming. They suffer from fundamental mechanical issues, terrible stat scaling, or require an absurd amount of effort for mediocre results. Avoid bringing these into higher difficulties unless you are deliberately trying to challenge yourself.
The "Melee Berserker" (Any Commando + Melee Weapons + Lifesteal)
In theory, a melee build sounds like a great fit for a John Carpenter-style action game. In practice, it is a death wish. This build stacks maximum lifesteal and attack speed to swing endlessly with machetes or baseball bats.
- The Weapon: The Chainsaw or the Enhanced Machete.
- The Perks: "Bloodlust" (melee lifesteal), "Frenzy" (attack speed on kill), and "Thick Skin" (damage reduction).
- Why it’s C Tier: The toxic mutants in this game are incredibly erratic, featuring lunging attacks, spitting attacks, and massive hitboxes. Furthermore, the late-game enemies utilize toxic auras that deal massive passive damage if you stand next to them. The lifesteal simply cannot out-heal the burst damage you will take by standing in melee range. You will frequently be one-shot by charging elites before your lifesteal even has a chance to trigger.
The "Pistolero" (Any Commando + Dual Pistols + Ammo Return)
This build attempts to create an infinite-ammo loop using dual wield pistols, relying on perks that return bullets to the magazine on headshots.
- The Weapon: Dual Match Pistols.
- The Perks: "One in the Chamber" (headshot returns 1 bullet), "Gunslinger" (increased pistol fire rate), and "Hollow Points" (pistol armor penetration).
- Why it’s C Tier: The math simply does not add up. While the "One in the Chamber" perk sounds great, the actual headshot hitbox on moving, spasming mutants is incredibly small. You will miss more often than you hit, meaning you will constantly be running out of ammo and forced to use your weak melee attack. Even when the infinite ammo loop works perfectly, the DPS is vastly inferior to a basic assault rifle, making it a gimmick that wastes a squad slot.
How to Use This Tier List
Understanding the meta is only half the battle in John Carpenter's Toxic Commando. To truly get the most out of this tier list, you need to apply it contextually to your squad composition and the specific missions you are tackling.
Squad Synergy is King: A team composed entirely of S Tier builds might actually fail if they overlap too much. For example, running two Toxic Chefs is redundant because there is a cap on how many DoT effects can actively tick on a single enemy. The ideal squad composition features one anchor/tank (S Tier Juggernaut), one massive crowd-control option (S Tier Toxic Chef or A Tier Boom Buggy), and one precision/target-focus build (A Tier Executioner or Battery Sentinel).
Adapt to the Mission Type: Keep an eye on the mission briefings. If you are doing an Escort mission where you have to stay in a fixed location, the B Tier Trapper build suddenly becomes much more viable, effectively elevating it to an A Tier rating for that specific scenario. Conversely, if you are playing a timed survival mission where the horde never stops spawning, the C Tier Pistolero will guarantee a failure.
Patch Volatility: Because Toxic Commando relies heavily on numerical multipliers and perk interactions, it is highly susceptible to balance patches. A slight nerf to the "Chain Reaction" perk radius would instantly knock the Toxic Chef down to A or B Tier. Similarly, if Dr. Assault's base health regen is tweaked, the Juggernaut build loses its invincibility factor. Always check the latest patch notes to see if the underlying math supporting these S Tier builds has been adjusted. Finally, remember that the game is designed to be a chaotic, B-movie style bloodbath—if you find a C Tier build that makes you laugh and fits your personal vibe, sometimes the fun factor is worth the statistical downgrade.


